Never Struggle Planning Activities Again

Easy to use activity booklets for your troop meeting.
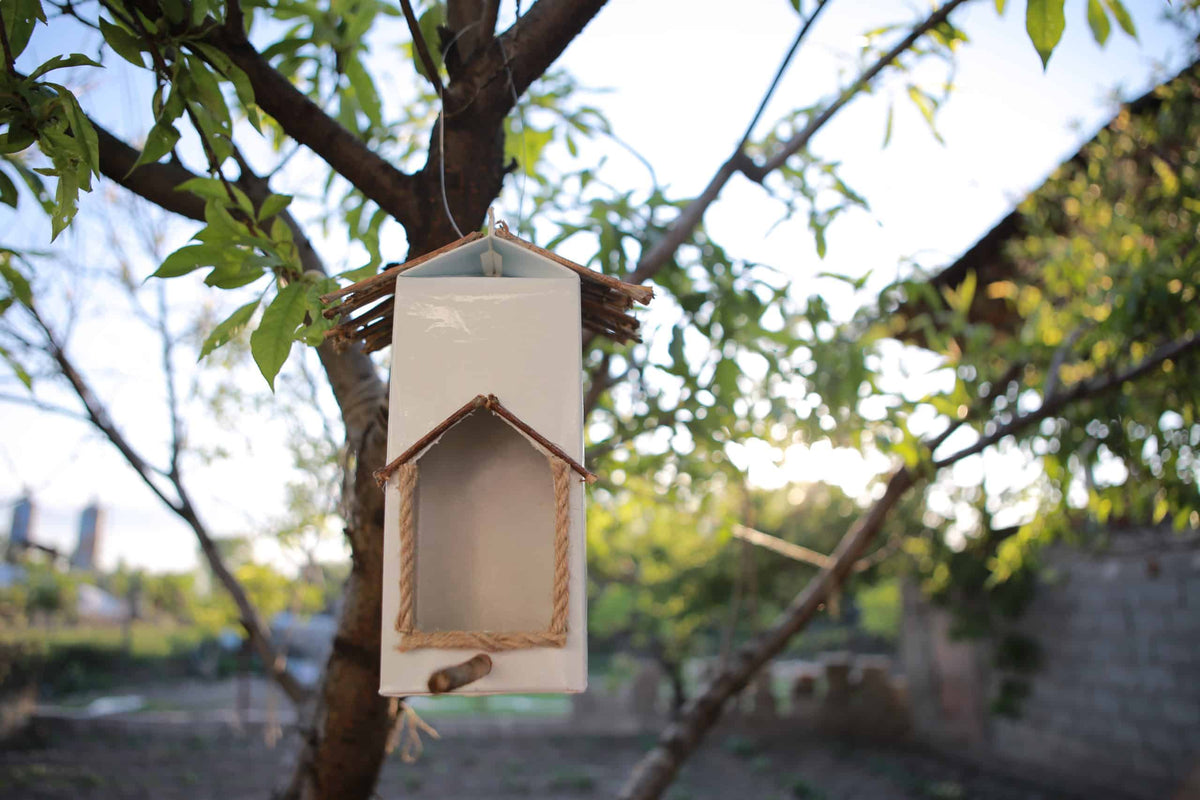
MILK CARTON BIRDHOUSE Craft IN tree

How to Make a Milk Carton Birdhouse

|

Time to read 2 min

I get commissions for purchases made through links on this post.

Spring and summer time bring the sounds of birds and nature all around us. It is a great time to make a milk carton birdhouse craft with your girls that will surely help fill up their backyards with beautiful birds. This is also a great craft to showcase the importance of recycling and making the world a better place.

Of course depending on the age of your girls you may want to do the first few steps of cutting out the cardboard before the meeting so girls are not using the knife. 

You can learn through directions and pictures and a short video showing birdhouse being made. Let’s get started!

For this craft you will need

  • Scalpel - For precise cutting and detailing.
  • Piece of Rope - To create a hanging or decorative feature.
  • Thin Little Woods - For constructing or decorating the birdhouse.
  • Paint (Optional) - To add vibrant colors and personal touches to your birdhouse.
  • White Spray - For a clean, fresh base or for highlighting details. (Buy on Amazon)
  • Hot Glue Gun - Essential for strong, quick bonding of materials. (Buy on Amazon)
  • Scissors - For cutting various materials.
  • Paper Carton (from juice, milk, yogurt, or cornflakes) - For the base structure of the birdhouse.

How to make milk carton birdhouse craft

  1. Take the cardboard and cut a hole on the front side to create the door.
Milk Carton Birdhouse step 1
  1. Take the spray and spray the box with white spray. If you are going to paint other colors on the house do that after the white spray drys. Either way make sure to let it dry completely before you continue with the decoration.
Milk Carton Birdhouse step 2
  1. When you are sure that the box is completely dry, take the scalpel and cut the plastic on the top of the box to get clean side. For the cutting process I’ve used scalpel because it was easier for me but you can use scissors as well.
Milk Carton Birdhouse step 3
  1. Glue some rope around the door to beautify the look of the birdhouse.
Milk Carton Birdhouse step 4
  1. To complete the bird house decoration glue some thin sticks on the upper side to create the roof of the house. For the gluing process I used a hot glue gun, but you can use any glue that you think will work.
Milk Carton Birdhouse step 5
  1. You can leave the Milk Carton Birdhouse as it is or you can put one longer stick on the bottom side where the birds will be able to stand.
Milk Carton Birdhouse step 6
  1. Also, you can make a hole in top to thread inside so you can hang the birdhouse on some tree. I’ve used thin wire for this step. Put food for birds inside and your project is finished.  Hang your Milk Carton Birdhouse outside and enjoy the birds who make a home.
Milk Carton Birdhouse step 7

Milk Carton Birdhouse Craft Video

Activities Beyond the Milk Carton Birdhouse Craft

If you want to teach your girls more about birds they may see in the house they are making you can use the “Bird, Nests, and Egg Guide” during your meeting to show them pictures and discuss with them the type of birds that would benefit from their bird house.


Keep exploring topics like this one:

Crafts Beyond Milk Carton Birdhouse Craft

Enjoy every minute being a leader and continue to inspire your girls!

BACK TO TOP