No Products in the Cart
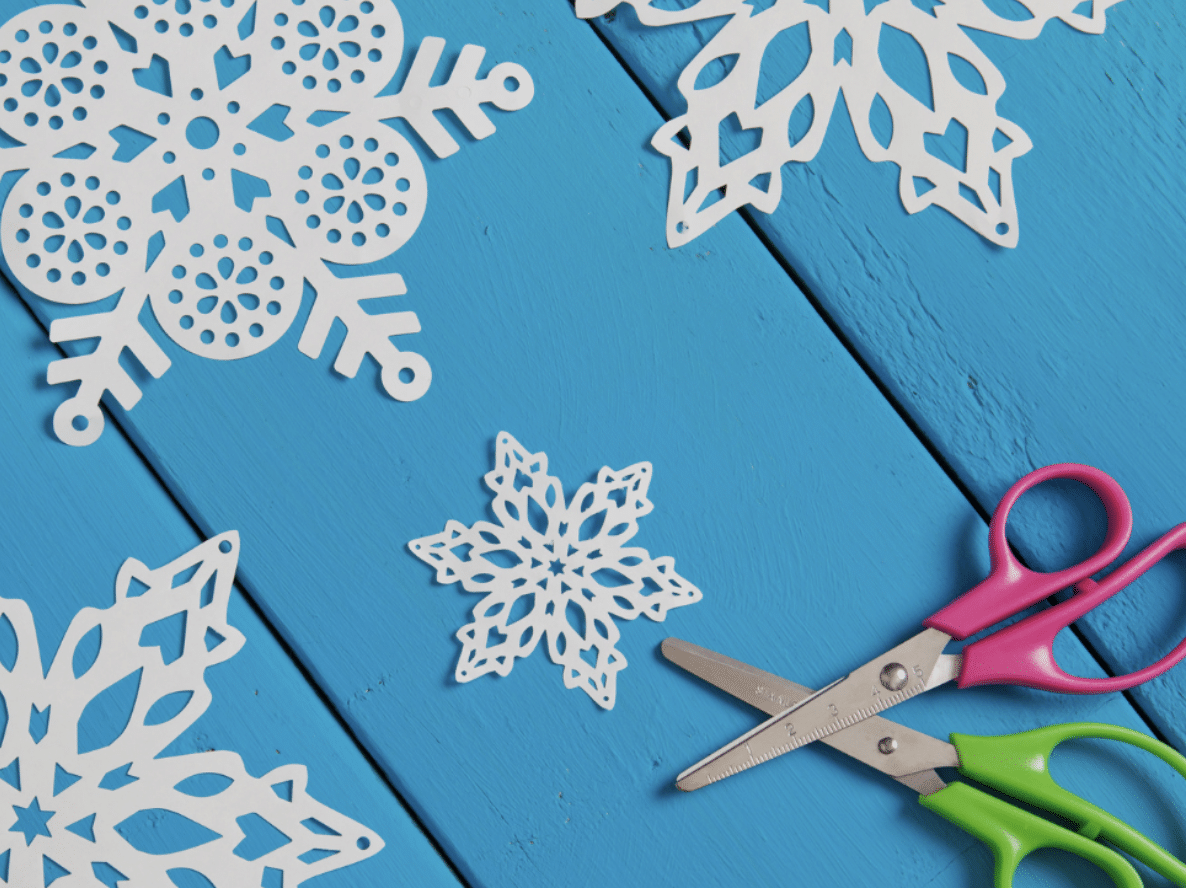
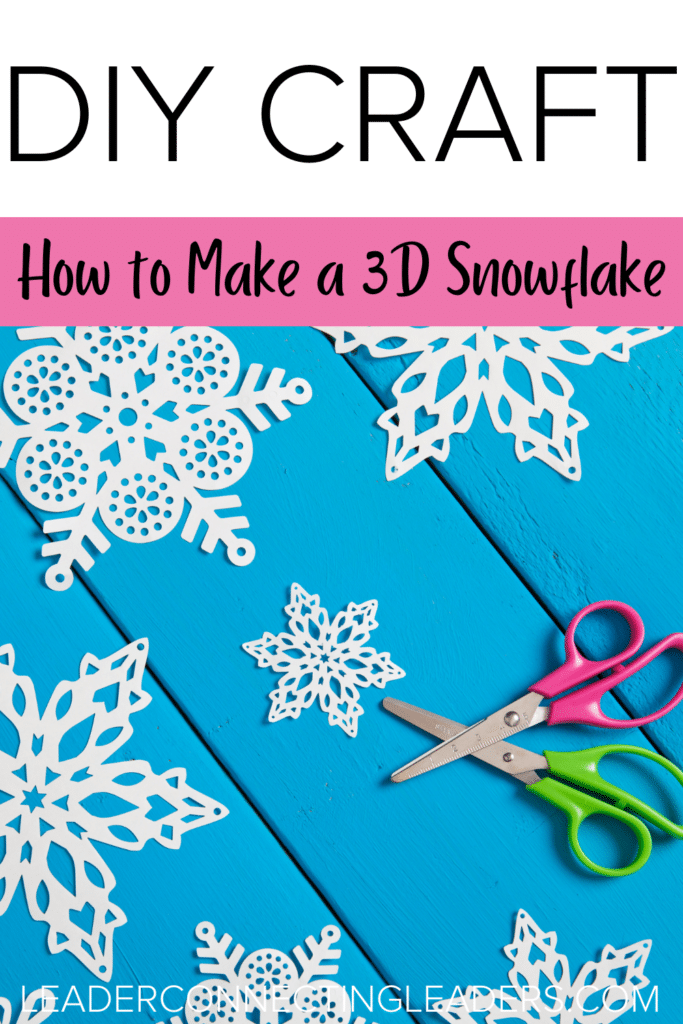
DIY Craft: How to Make 3D Snowflakes
|
Time to read 4 min
Never Struggle Planning Activities Again
Easy to use activity booklets for your troop meeting.|
Time to read 4 min
When you and your troop are all cooped up inside in the winter due to the snow and freezing temperatures, it can be tough to know what you could do to keep meetings fun and enjoyable. Well, look no further! Today I wanted to introduce a beautiful craft that will leave your scouts feeling empowered. Introducing: 3D Snowflakes!
You will want to learn this craft first so you can present it to your girls. The directions are written for adults, but with some assistance, this is a craft older scouts will definitely be able to complete!
Optional:
Step 1:
Hold the piece of paper in landscape orientation. Pull the bottom right corner up until the edge is flush with the top edge, and the other edge is parallel to the left edge, and fold. Cut off the remaining rectangle on the left side that is not doubled over.
Step 2:
Fold the triangle in such a way that you half the longest side of the triangle. You should end up with a smaller isosceles triangle.
Step 3:
Hold the right angle in your left hand, the scissors in your right, and cut 3 equidistant diagonal lines parallel to the top right edge, stopping just short of the left edge of the triangle.
Step 4:
Open up the piece of paper and lay it flat, shaped like a diamond. You will notice that there are 4 concentric diamonds.
Step 5:
Take the top and bottom of the innermost diamond and bring them in towards the center so they overlap. They should look kind of like a cannoli. Tape the overlapping part together on the outside so it stays put.
Step 6:
Flip the entire piece of paper over from left to right.
Step 7:
Take the top and bottom of the next diamond and bring them in toward the center so they overlap. They should also look like a cannoli. Tape the overlapping part together on the outside so it stays put.
Step 8:
Flip the entire piece of paper over from left to right again.
Step 9:
Take the top and bottom of the next diamond and bring them in toward the center so they overlap. They should also look like a cannoli. Tape the overlapping part together on the outside so it stays put.
Step 10:
Flip the entire piece of paper over from left to right one last time.
Step 11:
Take the top and bottom of the biggest diamond and bring them in toward the center so they overlap. They should also look like a cannoli. Tape the overlapping part together on the outside so it stays put.
Step 12:
Repeat steps 1-11 with all 6 pieces of paper.
Step 13:
Gather 1 point from each of the 6 folded pieces so that you’re holding all of the snowflake pieces between your thumb and pointer finger. Your scouts may especially need help with this step.
Step 14:
Use one vertical staple to staple all the pieces together.
Step 15:
Lay your creation on a flat surface and pull the farthest snowflake pieces together so that you have one massive 3 dimensional snowflake! Fluff any pieces that may need to be moved to make it look right.
Step 16:
Put one horizontal staple on the outermost pieces of each overlapping section. That’s it, your snowflake is complete!
Feel free to decorate your snowflakes however you want! You can use markers, stickers glitter glue, or any other materials your girls might want to use to make them look more fun. This step is not necessary, but it can make your girls more excited about their individual snowflakes. This can lead into a fun lesson about individuality and creativity, because each of your girls is unique and special, like a snowflake!
If desired, you can use a hole punch to make a hole in one of the points of the snowflake and tie some string onto it so your girls can hang it up in their house. Or, if you have a designated meeting place you’re allowed to decorate, you can use the snowflakes to decorate that room as a memory of your time together and the lesson they learned about their individuality.
If you would like a video tutorial so you can visualize the steps easier and teach it to your girls more seamlessly, I would recommend this one. Enjoy your craft!
" class="wc-block-grid wp-block-handpicked-products wc-block-handpicked-products has-3-columns has-multiple-rows">
 Outdoor Art Expert Activity Booklet
$7.00
Add to cart
Add to WishlistAlready In Wishlist Add to Wishlist
Outdoor Art Expert Activity Booklet
$7.00
Add to cart
Add to WishlistAlready In Wishlist Add to Wishlist
 Outdoor Art Apprentice Activity Booklet
$7.00
Add to cart
Add to WishlistAlready In Wishlist Add to Wishlist
Outdoor Art Apprentice Activity Booklet
$7.00
Add to cart
Add to WishlistAlready In Wishlist Add to Wishlist
 Outdoor Art Explorer Activity Booklet
$7.00
Add to cart
Add to WishlistAlready In Wishlist Add to Wishlist
Outdoor Art Explorer Activity Booklet
$7.00
Add to cart
Add to WishlistAlready In Wishlist Add to Wishlist
 Outdoor Art Creator Activity Booklet
$6.00
Add to cart
Add to WishlistAlready In Wishlist Add to Wishlist
Outdoor Art Creator Activity Booklet
$6.00
Add to cart
Add to WishlistAlready In Wishlist Add to Wishlist
Enjoy every minute being a leader and continue to inspire your girls!
Purchase this wonderful illustrated book from Amazon.


