No Products in the Cart
How to Make Your Own Whimsical Pinecone Fairy Craft
|
Time to read 4 min
Never Struggle Planning Activities Again
Easy to use activity booklets for your troop meeting.|
Time to read 4 min
There's something truly magical about transforming humble natural elements into whimsical creations. If you're a Girl Scout leader looking for a delightful craft that connects your troop with nature, sparks imagination, and results in an adorable keepsake, you'll absolutely love making pinecone fairies!
These charming little fairies are perfect for decorating a room, adding a touch of woodland wonder to your home, or even gifting to a fellow fairy enthusiast. And the best part? They're surprisingly simple to create, even for beginners.
In this post, I will walk you through every step of crafting your very own pinecone fairy, from gathering your supplies to adding the final, delicate touches. I will provide clear directions, helpful tips, and even suggest ways to personalize your fairy to make it truly unique. So, gather your crafting supplies, prepare to unleash your inner artist, and let's embark on this enchanting journey together!
Before we dive into the fun of creation, let's make sure you have all the necessary tools and materials ready. Don't worry, most of these items are easily found around your home, in nature, or at your local craft store.
Pinecone (get on Amazon or go outside and get one in nature)
Small wooden ball (get on Amazon)
Brush
Wooden slice
Two green leafs
Black, green and pink marker
Hot glue gun and glue sticks (get on Amazon)
Green paint (or other color of your choice)
Now that you have all your supplies, let's bring your pinecone fairy to life!
Begin by transforming your pinecone into the fairy's body. Take your chosen paint color – I've opted for a vibrant green to evoke a woodland feel, but the beauty of this craft is that you can choose any color your heart desires!
Using your paintbrush, carefully apply the paint to the scales of the pinecone. You can try to get into every nook and cranny for full coverage, or simply dry-brush the tips of the scales for a more rustic, textured look. If you're using spray paint, lay the pinecone on newspaper or a drop cloth in a well-ventilated area and apply light, even coats, rotating the pinecone to ensure full coverage. Spray paint can be quicker and provide a smoother finish, but a brush allows for more control and detail.
Once painted, set your pinecone aside to dry completely. This is a crucial step; attempting to assemble your fairy before the paint is dry will lead to smudges and a messy result. Depending on the type of paint and humidity, this could take anywhere from 30 minutes to a few hours.
While your pinecone is drying, you can begin working on the fairy's head. Take your small wooden ball.
First, use your green marker (or your chosen hair color) to draw a hairline and fill in the hair shape. You can give your fairy flowing locks, a neat bob, or even a spiky do – let your imagination guide you! I prefer using a marker for this step because it allows for precise control, and you don't have to wait for the "hair" to dry before moving on.
Next, pick up your black marker to draw the eyes and a small mouth. You can give your fairy open eyes, closed sleepy eyes, or even little dots for a minimalist look. A simple curve for the mouth will give your fairy a sweet expression. Finally, take your pink marker (or a touch of pink paint) and add two tiny dots on the cheeks for a touch of rosy blush. And just like that, your fairy's adorable head is ready!
Once your painted pinecone is completely dry, it's time to assemble your fairy.
Carefully pick up your pinecone. The very top of some pinecones can be quite sharp or pointed, making it difficult for the wooden ball head to sit flat. If this is the case with your pinecone, you might want to carefully snip off the very tip with strong scissors or pliers, or gently sand it down to create a flatter surface. This will provide a more stable base for the head.
Apply a generous amount of hot glue to the top, flattened part of the pinecone. Quickly, but carefully, center and press the wooden ball head onto the glue. Hold it firmly in place for a few seconds until the glue sets and the head is securely attached.
Next, it's time to give your fairy a sturdy foundation. Apply a good amount of hot glue to the bottom of the pinecone. Position your pinecone fairy onto the wooden slice (or your chosen base) and press down firmly. Hold it in place until the glue cools and hardens, ensuring your fairy stands upright and stable.
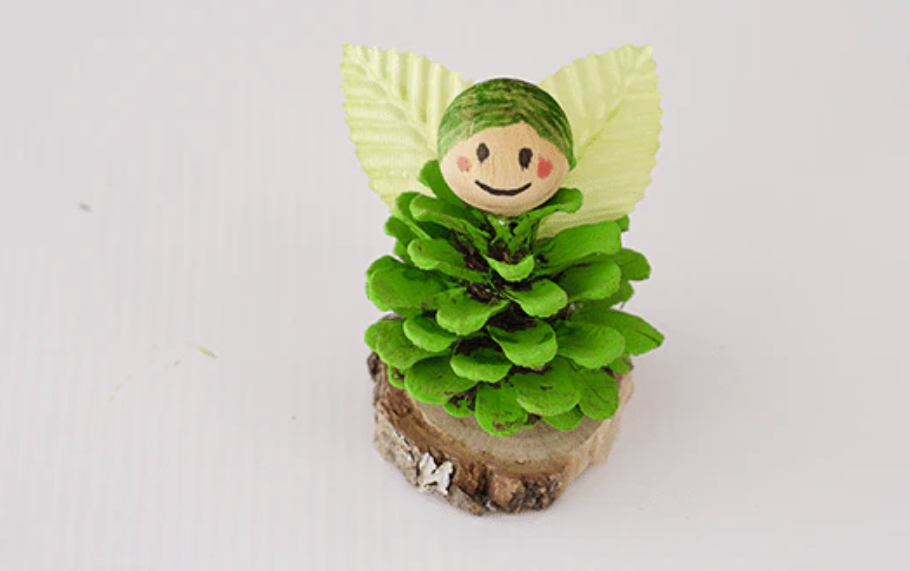
The final step in bringing your fairy to life is adding its beautiful wings. Take your two green leaves. Position them on the back of your pinecone fairy, experimenting with angles until you find a graceful, wing-like arrangement.
Once you're happy with the placement, apply a line of hot glue along the stem or a suitable edge of one leaf and press it firmly onto the back of the pinecone, just below the head. Repeat with the second leaf, overlapping slightly if desired, to create the appearance of a full set of wings. Hold each leaf in place for a few moments until the glue cools and the wings are securely attached.
Congratulations! You've just created a beautiful, one-of-a-kind pinecone fairy. This simple yet rewarding craft is a testament to the magic that can be found in everyday natural objects. Each fairy you make will have its own unique charm, perfect for adding a touch of whimsy to your home or gifting to someone special.
For a visual guide to accompany these instructions, be sure to check out this short video, demonstrating each step in action.
Enjoy every minute being a leader and continue to inspire your girls!


