No Products in the Cart
How To Make a Autumn Pumpkin Message Board
|
Time to read 3 min
Never Struggle Planning Activities Again
Easy to use activity booklets for your troop meeting.|
Time to read 3 min
I get commissions for purchases made through links on this post.
Making an autumn pumpkin message board is a perfect activity for a Girl Scout meeting! This craft is not only fun but also allows each scout to create something unique to celebrate the fall season. It's a great way to encourage creativity
Gathering the supplies is the first step to a successful meeting. You'll need the following materials for each scout:
Tip: If you're short on time or want a convenient option, many craft stores and online retailers like Amazon sell "DIY wooden pumpkin craft kits." These often include the pumpkin shape, paints, and a selection of decorations, making it a great all-in-one solution.
Step 1: Paint the Pumpkin Orange
Begin by preparing your workspace and gathering all your materials. Take your wooden pumpkin shape and a paintbrush, and apply a base coat of orange paint. Don't be too concerned with perfection at this stage; the goal is simply to cover the entire surface of the pumpkin. Be sure to paint the edges and sides as well to ensure a polished look. This initial layer creates a vibrant canvas for the rest of your design.
Step 2: Add Different Shades
Once the first layer of orange is completely dry, it's time to add some character. Grab a different shade of orange—a lighter or darker one works well—and a new brush. With this color, you can add subtle streaks or blended strokes to create highlights and shadows. This technique gives the pumpkin a more realistic, dimensional appearance, making it look less flat and more like a real pumpkin from the patch.
Step 3: Attach the Stem
With the paint finished and dry, it's time to add the iconic pumpkin stem. Take a small piece of cinnamon stick and, with a hot glue gun, carefully secure it to the top of your wooden pumpkin. The cinnamon stick not only acts as a rustic, natural-looking stem, but it also adds a lovely, subtle scent of fall to your finished piece.
Step 4: Place the Leaves
With your leaves in place, you can now add the other small decorations, such as decorative flowers, small twigs, or berries. These extra elements add color, texture, and visual interest. Use them to fill in any empty spaces or to create a focal point. Feel free to experiment with different arrangements until you find a design you love.
Step 5: Add Other Decorations
With your leaves in place, you can now add the other small decorations, such as decorative flowers, small twigs, or berries. These extra elements add color, texture, and visual interest. Use them to fill in any empty spaces or to create a focal point. Feel free to experiment with different arrangements until you find a design you love.
Step 6: Write Your Message
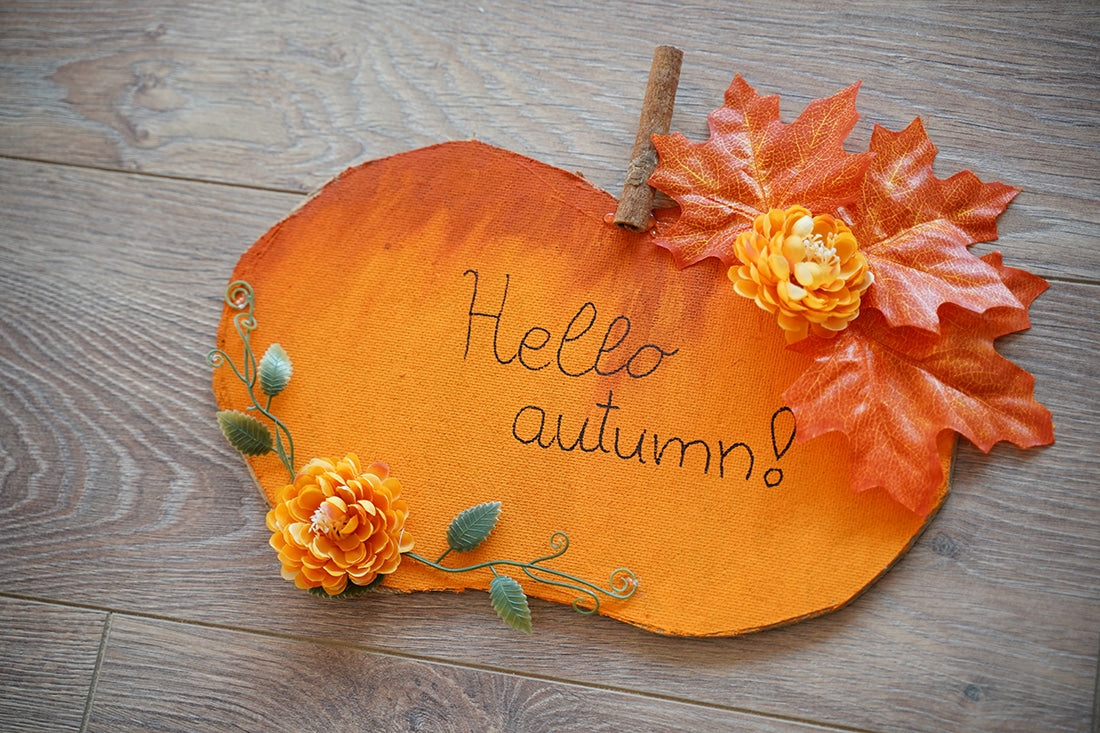
The final and most personal step is to add your message. Using a black permanent marker, carefully write your chosen phrase in the center of the pumpkin. Popular choices include "Hello Autumn," "Happy Fall," or "Give Thanks," but you can also write a family name, a favorite quote, or a short, meaningful phrase. This final touch makes the craft truly your own.
By the end of the meeting, every Girl Scout will have a beautiful, handcrafted message board to take home. This craft is a wonderful way to celebrate the season and practice some creative skills.


