No Products in the Cart

How to Make a Mermaid Using a Wooden Spoon
|
Time to read 2 min
|
Time to read 2 min
I get commissions for purchases made through links on this post.
Welcome to a magical crafting adventure! In this blog post, we’ll teach you how to create a delightful mermaid using a wooden spoon. This fun and easy craft is perfect for kids and adults alike and makes a charming decoration or gift.
With our detailed instructions, photos, and a short video tutorial at the end, you’ll be well on your way to making your own mermaid in no time. Let’s get started!
Before we start, gather the following supplies. You can find most of these items easily on Amazon:
Step 1: Draw the Tail
Start by drawing the mermaid’s tail on the back side of the blue foam with glitter. Use a pencil for this step to ensure you can make adjustments as needed. Make sure the tail is large enough to fit the bottom of the wooden spoon, which will act as the mermaid's body. The tail should be detailed and elegant, with a nice curve representing the fin.
Step 2: Cut out the Tail
Carefully cut out the tail shape from the blue foam using scissors.
Step 3: Attach the Tail
Using a hot glue gun, carefully attach the tail to the bottom of the wooden spoon. Make sure to press firmly and hold it in place until the glue sets. This will ensure the tail is securely fastened and won’t come loose as you continue your project.
Step 4: Add Glitter
For a touch of sparkle, cover one part of the spoon's bottom with glue. Then, pour pink and purple glitter over the glue while it’s still wet. Shake off any excess glitter to ensure a clean finish. This step will give the mermaid’s tail a shimmering, magical effect.
Step 5: Prepare the Body
Glue the spoon onto the purple foam with glitter. Cut the foam, leaving some space around the head of the mermaid. For the side with the longer piece of foam, divide it into three sections. Braid these sections to create the mermaid’s hair. Secure the end of the braid with glue and attach it to the top of the wooden spoon.
Step 6: Add the Seashell Top
Glue the two small shells onto the top part of the wooden spoon to represent the mermaid’s seashell top. Position them carefully so that they cover the spoon’s top part and resemble a bikini top. Make sure the shells are securely attached and won’t move.
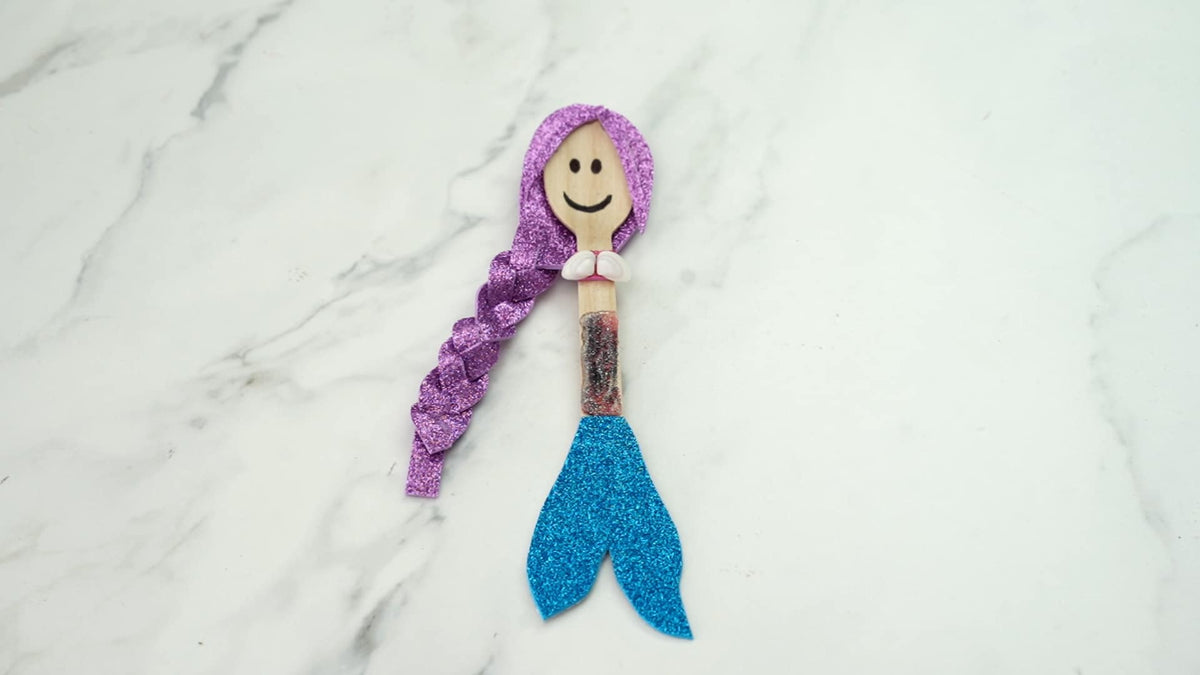
Completed Mermaid Wooden Spoon
Congratulations on finishing your enchanting mermaid craft! Your beautiful wooden spoon mermaid is now complete and ready to be displayed or gifted.
Check out this short video tutorial for a more detailed look at the process. It will walk you through each step and show you exactly how to assemble your mermaid craft.
If you’re looking for more mermaid-themed craft ideas, be sure to check out our Pinterest board filled with amazing mermaid crafts for kids. From mermaid tails to underwater scenes, there are plenty of creative projects to explore.
Enjoy every minute being a leader and continue to inspire your girls!


