No Products in the Cart

How to Make a Shamrock out of Mud Paint Step-by-Step
|
Time to read 3 min
|
Time to read 3 min
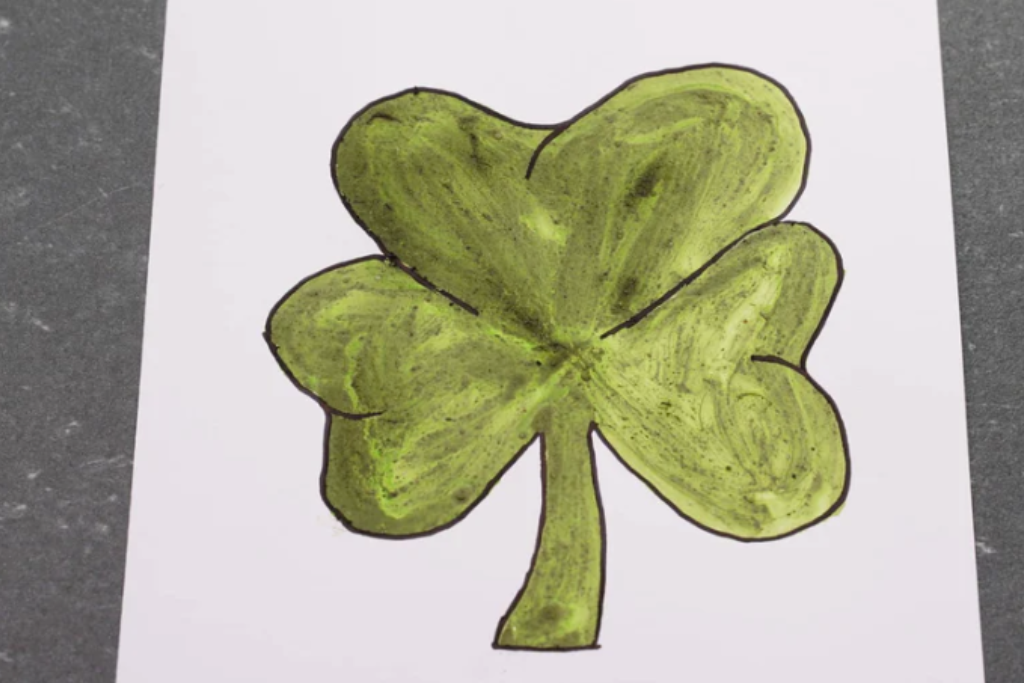
Learn how to make a Shamrock out of Mud Paint. You will do this mud painting craft with a few simple supplies. You can learn through directions and pictures and a short video at end of post showing how to do it. Let’s get started!
Before we dive into the how-to, let's talk about why mud painting is so excellent!
STEP 1: Gather the Materials
Collect small containers for mixing mud paint, soil or clay, water, green food coloring or powdered spinach, paintbrushes, and sturdy paper or cardboard.
STEP 2: Prepare the Mud Paints
To create some mud art you first need to create mud paint. Take some plastic cup and mix the sand and water first. When that is mixed add the food coloring inside and mix again with the brush. You will get lighter or darker depending how much color you are going to put in. You can use a lot of different paints just follow same process to make the different colors.
Step 3: Create the Shamrock Shape
Take the white cardboard and start painting. Using a paintbrush or fingertips, carefully mold the mud paint onto the paper or cardboard in the shape of a shamrock. Encourage your girls to express their creativity by experimenting with different sizes and styles of Shamrock out of Mud Paint.
STEP 4: Add Details and Texture
Use additional layers of mud paint to add texture and detail to the shamrock. You can create patterns, lines, or designs within the shamrock shape to make it more visually appealing.
STEP 5: Let It Dry
Allow the Shamrock out of Mud Paint to dry naturally. Depending on the thickness of the mud paint, this may take a few hours or longer.
STEP 6: Add Border
When you are sure that the art is completely dry, take the black marker and draw the edges with it to make it look like it pops as you can see on the photos.
Step 7: Display or Gift
Once the Shamrock out of Mud Paint is completely dry, it can be proudly displayed as a piece of natural artwork. Encourage your girls to gift their creations to family members or friends as an eco-friendly keepsake.
Do you need more mud painting ideas? Check out all these amazing ideas on my Mud Painting Craft Ideas For Kids Pinterest Board.
Making a Shamrock out of Mud Paint provides a hands-on opportunity for the girls in your troop to connect with nature while expressing their artistic talents. This craft not only fosters creativity but also encourages environmental awareness through the use of natural materials. Try this engaging activity with your girls to celebrate St. Patrick's Day or to simply enjoy a sustainable art project together.
Mud Painting Tips & Tricks:
Enjoy every minute being a leader and continue to inspire your girls!


