No Products in the Cart

How to Make a Paper Pumpkin Perfect for Halloween
|
Time to read 2 min
|
Time to read 2 min
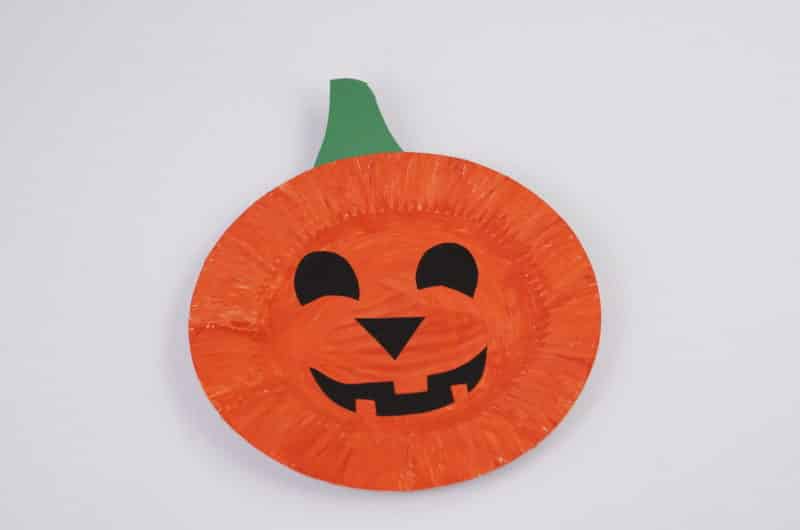
This easy and fun paper plate pumpkin craft is perfect for troop meetings in the fall! It's a great activity for K-5th graders and allows for lots of creativity. With just a few simple supplies, your girls can create their very own jack-o'-lanterns to take home and decorate with.
Paper plates: One per girl, plus a few extras for mistakes.
Orange paint: Tempera or acrylic paint works well. Consider having a few different shades of orange for variety.
Black construction paper: For cutting out the pumpkin's face.
Green construction paper: For the stem and vine.
Glue: Craft glue or glue sticks work well.
Scissors: Kid-safe scissors are best for younger girls.
Paint brushes: A few sizes will give the girls options.
Newspaper or craft paper: To protect your work surface.
Smocks or old t-shirts: To keep the girls' clothes clean.
Step 1: Get the Painting Started
Start by covering your workspace with newspaper or craft paper to make cleanup easier. Give each girl a paper plate, a paintbrush, and some orange paint. Encourage them to paint their entire paper plate orange.
This is a great time to talk about what pumpkins are used for and how they grow. You can also let the girls know that their pumpkins don't have to be perfect—some real pumpkins have blotches and different colors!
Once they've finished painting, set the plates aside in a safe place to dry completely. This is a crucial step; if the paint isn't dry, the glue won't stick properly in the next steps.
Leader Tip: While the plates are drying, you can have the girls start on the next step or do a different activity, like a quick game or a snack.
Step 2: Create the Jack-o'-Lantern Face
While the plates are drying, pass out the black construction paper and scissors. Have the girls draw and cut out shapes for their pumpkin's eyes, nose, and mouth.
Remind them that a jack-o'-lantern's face can be silly, spooky, or happy—there's no right or wrong way to do it.
Once the painted paper plates are completely dry, it's time to glue on the faces. Have the girls arrange their cut-out shapes on the paper plate until they are happy with the design. Then, they can use glue to secure the pieces in place.
Leader Tip: For younger girls (Daisies and Brownies), you might want to have some face templates they can trace and cut out. For older girls (Juniors and Cadettes), encourage them to create more complex or unique designs
Step 4: Add the Finishing Touches
Now for the final flourish! Using green construction paper or craft foam, have the girls cut out a small rectangle for the stem and a curly spiral for a vine. They can glue the stem to the top back of the paper plate and the vine to the front. This extra detail really makes the pumpkin pop!
Leader Tip: Consider having some extra craft supplies on hand, like glitter glue, googly eyes, or pipe cleaners, so the girls can add their own personal flair to their pumpkins.
Turn it into a magnet! Glue a small magnet to the back of the finished paper plate pumpkin so the girls can display their creations on the fridge at home.
Make it a card. Use the paper plate pumpkin as the front of a card to give to family or friends.
Create a spooky scene. Have the girls make other Halloween-themed crafts, like paper bats or ghosts, to create a full scene to decorate your meeting space.
I hope this detailed guide helps you have a successful and fun pumpkin craft with your troop!
This quick video tutorial shows you how to make an adorable paper plate pumpkin from start to finish. Follow the simple steps to paint your plate, cut out a spooky or silly face, and assemble your very own jack-o'-lantern!
Enjoy every minute being a leader and continue to inspire your girls!


