No Products in the Cart

How to Make a Fairy House From K Cups
|
Time to read 3 min
|
Time to read 3 min
I get commissions for purchases made through links on this post.
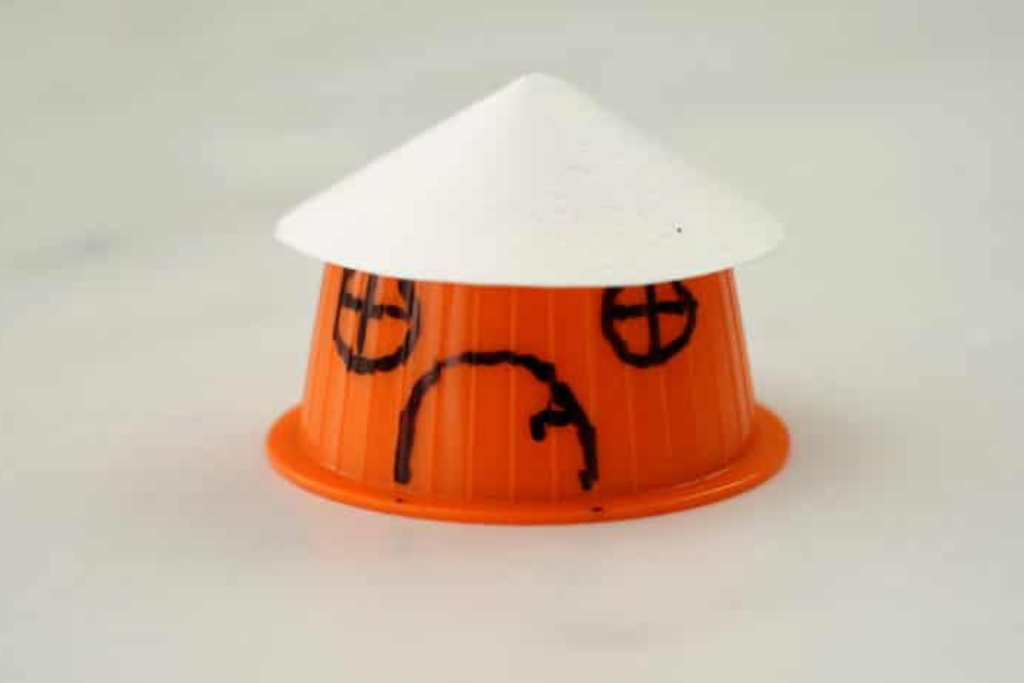
Welcome to a magical crafting adventure, perfect for Girl Scouts! Today, we’ll show you how to create your Fairy House From K Cups. Follow our easy step-by-step guide with pictures and a video tutorial to craft a charming fairy house. Get ready for a fun and creative activity your troop will love!
Before you start making your Fairy House From K Cups, gather the following supplies. You can easily find most of these items online, including on Amazon for convenience:
Step #1: Optional Paint Your Fairy House From K Cups
If you prefer a colored fairy house, you can paint your K-cup. Choose any color that suits your fairy-tale theme and let it dry completely before proceeding. This step adds a unique touch and allows you to customize your fairy house to your liking.
Step #2 - Draw Windows and Door:
Using the black marker, draw windows and a door on the K-cup. This step adds personality to your fairy house and makes it look inviting. Feel free to add any other details like bricks or flowers.
Step #3 - Draw the Circle:
Using a drawing compass, draw a circle on the white cardboard. Make sure to mark the center of the circle. This will form the roof of your fairy house.
Step #4 - Form the Roof:
Overlap the two sides of the circle along the cut line and glue them together to form the roof. Please make sure that the cone shape is secure and the glue has dried properly.
Step #5 - Attach the Roof:
Apply glue to the top rim of the K-cup and carefully place the cardboard roof on top. Make sure it is centered and secure.
Let It Dry: Allow the glue to dry completely before moving or decorating further. This ensures that your roof stays in place and your fairy house remains intact.
Step #6
Once your Fairy House From K Cups is fully assembled and dry, you can add extra decorations like glitter, tiny flowers, or even small fairy figures. Customize it to fit your magical vision!
To make this project even easier, we’ve created a short video that demonstrates each step of making your fairy house from k cups. Check it out for a visual guide that will help you through the crafting process!
And there you have it—a charming Fairy House From K Cups! This fun and easy craft project not only provides a delightful way to recycle but also sparks creativity and imagination. Whether you’re creating it for your garden, a playroom, or as a gift, this fairy house will add a touch of magic wherever it goes.
Remember, the beauty of crafting is in making something uniquely your own, so feel free to experiment with colors, decorations, and designs. We hope you enjoyed this project as much as we did. Share your creations with us and tell us how your fairy house turns out!
For more creative ideas and crafting tips, stay tuned to our blog, and don’t forget to sign up for updates. Happy crafting! 🌟🧚♀️🏡
One thing we all know as leaders we need all the help we can get to make the program fun, educational, and to help build the girl leaders of tomorrow. This post is packed full with ideas for:
Enjoy every minute being a leader and continue to inspire your girls!


